


Web Landscapes Client guides Cloudflare access
Give Web Landscapes access to Cloudflare
You add us as a member of your Cloudflare account. We get our own login, you keep ownership, and you can remove us at any time with one click.
- Time
- About 5 minutes
- You'll need
- Your Cloudflare account and our email address
- Role to choose
- Administrator
8 steps. Select a number to go straight to it.
Before you start
- You need your own Cloudflare account first. If you don't have one yet, follow Create your Cloudflare account.
- The email address to invite is
contact@weblandscapes.com. Copy it exactly. If we gave you a different address for your project, use that one. - Use a computer. The Members page is easier to use on a big screen than on a phone.
Which role to give us, and why
Choose Administrator. It's the smallest role that still lets us build and run everything your website needs: your domain's DNS, the hosting (Workers and Pages), databases and file storage, email forwarding, and the security settings that block spam and attacks.
| What the role can do | Super Administratoryou, the owner | Administratorwhat we ask for | Domain Administrator | Administrator Read Only |
|---|---|---|---|---|
| Build and publish your website | Yes | Yes | No | No |
| Change your domain's DNS and email settings | Yes | Yes | Yes | No |
| Change the billing profile and payment method | Yes | No | No | No |
| Change plans and add-ons (billed to you) | Yes | Yes | For its domains | No |
| Add or remove members | Yes | No | No | No |
Cloudflare's own description of Administrator: it can access the full account and edit subscriptions, but can't manage members or the billing profile. Changing a plan can change what you pay, so we never change yours without asking you first.
If your business needs tighter limits, for example a policy that covers only one domain, tell us before you send the invite and we'll agree the exact roles with you. A narrower set can work, but a build often needs a setting outside it, and then the invite has to be changed partway through.
Steps
-
Sign in to Cloudflare
Go to dash.cloudflare.com and sign in with your email, password and two-step code.
-
Open Manage account, then Members
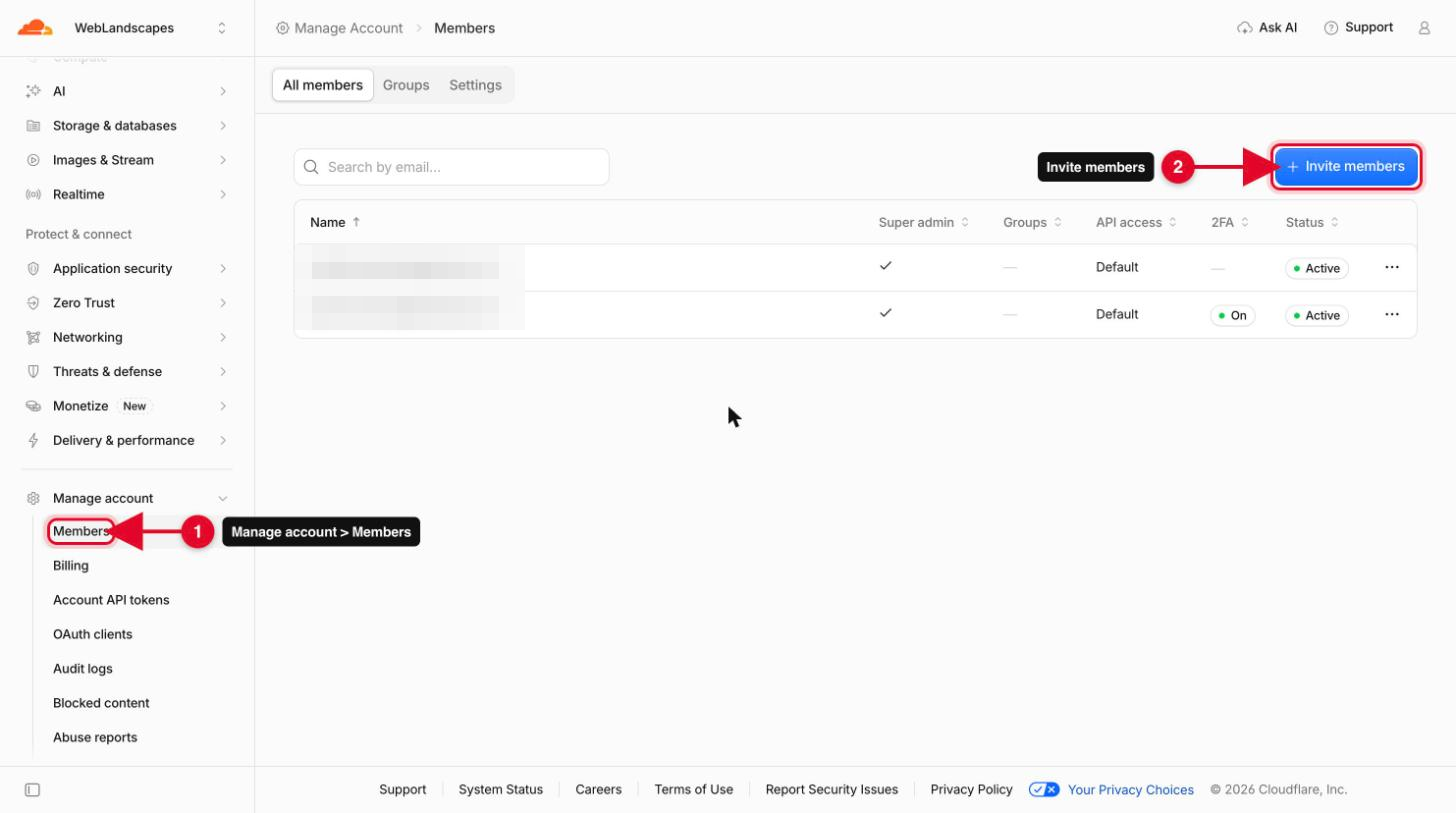
In the menu on the left, scroll down to Manage account and select Members (number 1 in the picture). If the menu is hidden, select the icon at the bottom left to open it.
-
Select Invite members
Select the blue Invite members button at the top right (number 2 in the picture above).
-
Type our email address
Under Add email addresses, type
contact@weblandscapes.comand select the line that appears below it, starting with Add.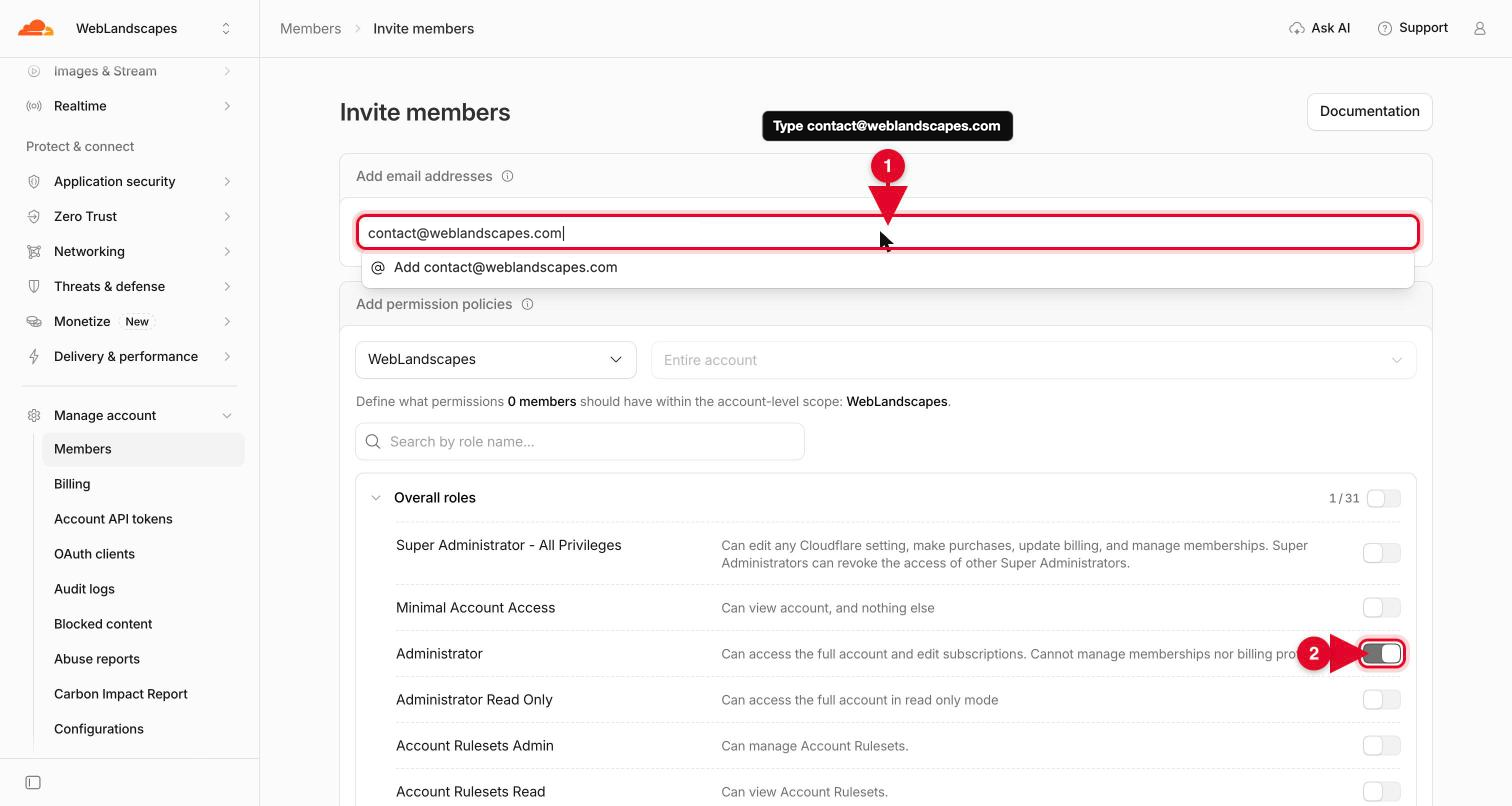
-
Turn on the Administrator role
Under Add permission policies, leave the first box on your account's name and the second on Entire account. In the list of Overall roles, turn on the switch next to Administrator (number 2 in the picture above). Leave every other switch off.
ImportantNot Super Administrator, the first role in the list. That one would let us manage your billing and your members, and we don't need either.
-
Select Create policy
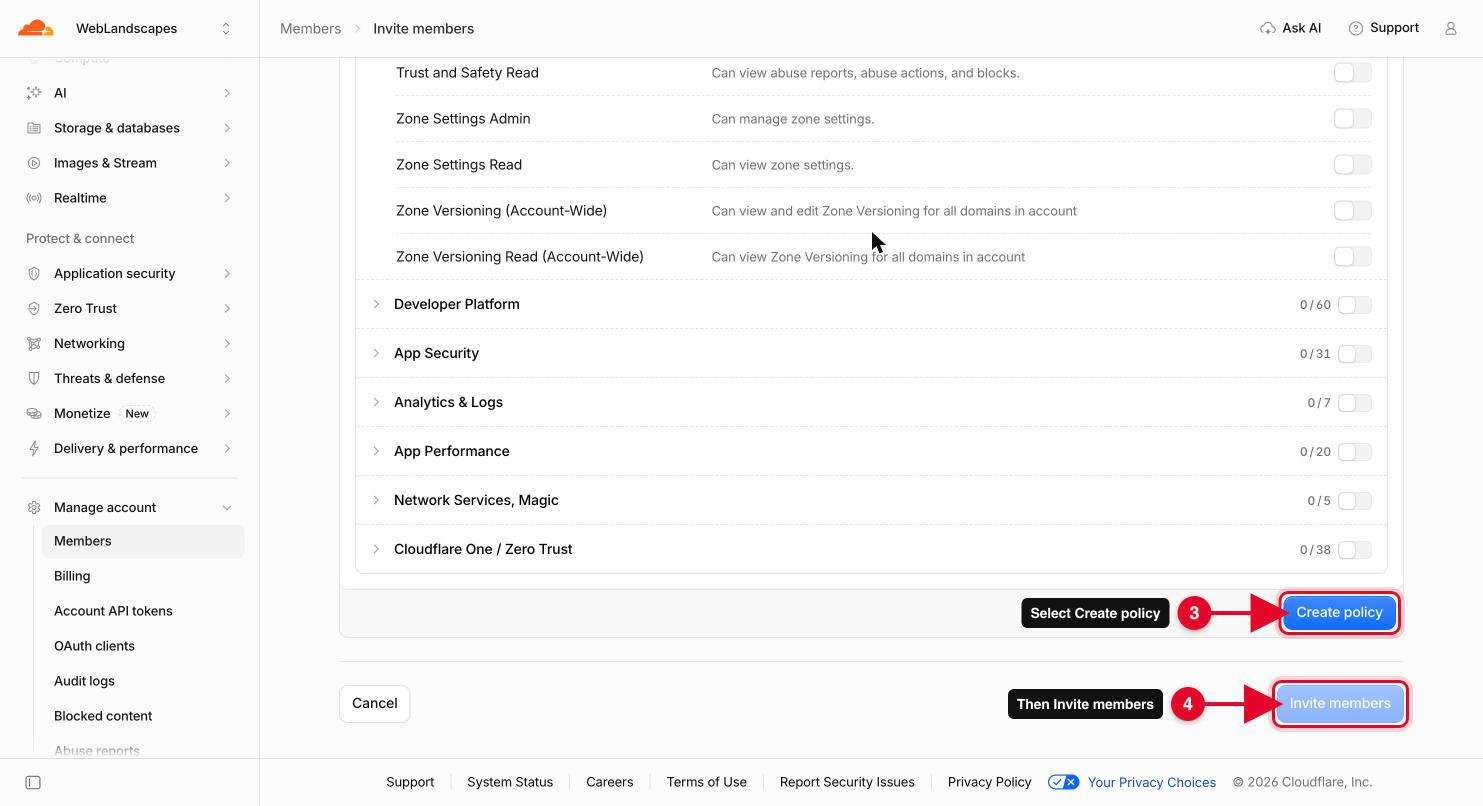
Scroll to the bottom of the list and select Create policy (number 3). The Invite members button stays gray until you do.
-
Select Invite members
Select Invite members at the bottom of the page (number 4). Cloudflare emails the invitation to us.
-
Let us know
Email or text us that the invite is sent. We accept it and confirm back to you. Until then our address shows as Pending on your Members page, which is normal.
You'll know it worked when
- Our address appears on your Members page.
- Its status changes from Pending to Active once we accept.
- We email you to confirm we can see your account.
If something goes wrong
I can't find Members or Invite members
Check the account name at the top left: you may be in a different account. Only a Super Administrator can invite members, so if someone else opened the account for your business, they need to do this, or give you that role first.
The invite expired or never arrived
On the Members page, select the three dots at the end of our row, then Resend invite.
I picked the wrong role
Select the three dots at the end of our row, then View & Edit permission policies, and change it to Administrator.
I want to remove your access later
Select the three dots at the end of our row, then Remove member. It takes effect at once, and your site keeps running.
Stuck on a step?
Tell us which step and what you see on the screen, and we'll walk you through it. A screenshot helps. Never send us a password or a backup code: we won't ask for one.
Contact@WebLandscapes.com+1 786 608 8489Book a call and do it together
Official help: Manage account members · Roles
Next guideBuy a domain in Cloudflare →